How I built my i-cord holder
- Feb 2
- 3 min read
I get asked about my i-cord holder all the time, so I finally decided to write a short article about it. This isn’t a perfectly polished DIY tutorial, it’s simply how I built it, step by step, with what I had, and how it slowly evolved with my work.
The starting point:
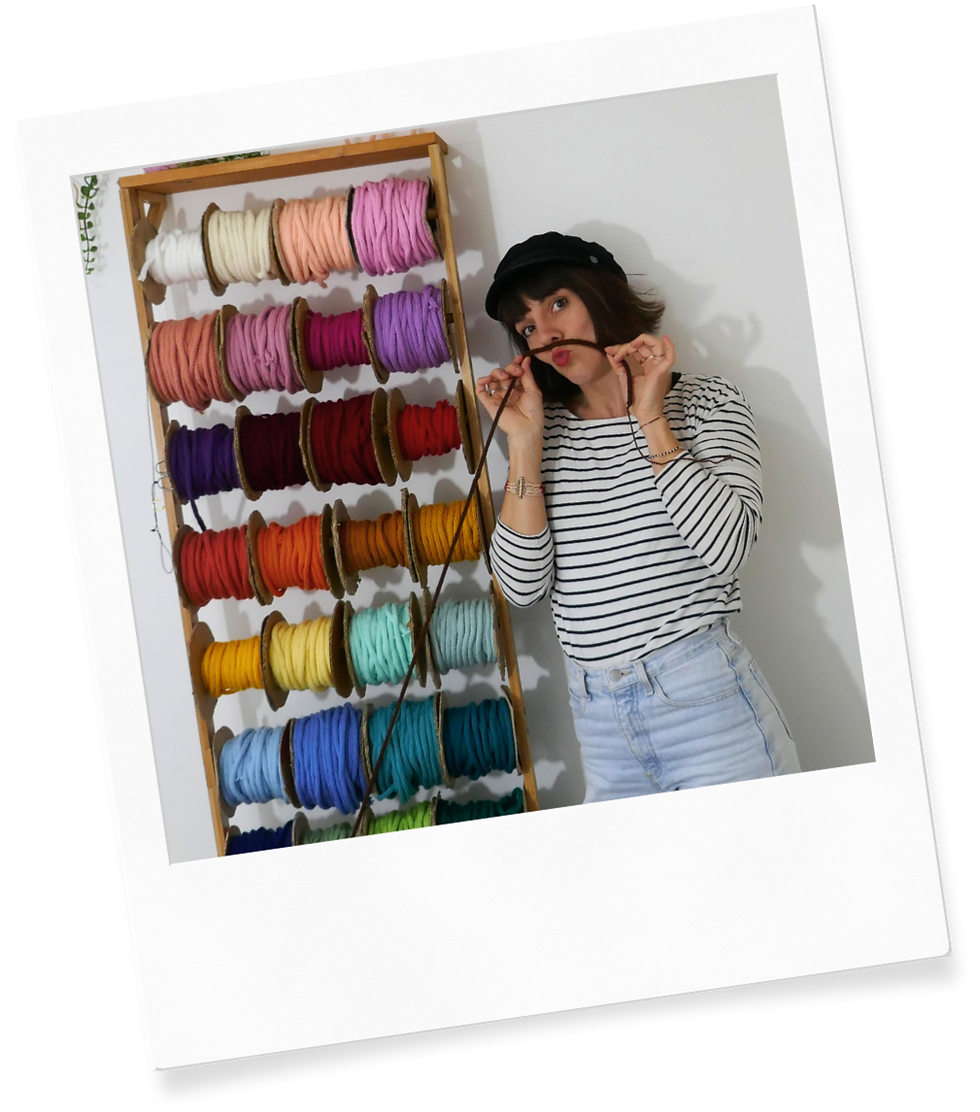
The base of my i-cord holder is a second-hand bamboo ladder I luckily found on Facebook Marketplace for $10.
Originally, it had 6 horizontal rods, but I quickly realised it wasn’t enough for the number of i-cords I had. So my plan was to add 5 extra rods, positioned between the original ones, and to create some cardboard bobbins and slide them on the rods.

What I did:
I measured the length and diameter of the original rods
Cut 5 extra wooden rods to the same size
Drilled a hole at each end of the new rods
Drilled holes in the bamboo ladder sides in between the existing rods
Screwed the new rods
It’s a simple system, but it requires accurate measuring and a bit of patience.
Once the rods were in place, I focused on the bobbins. Before making anything, I measured the space between each rod to determine the ideal bobbin size and diameter.
The bobins:
I wanted bobbins that were big enough to hold a decent length of i-cord, but small enough to sit comfortably without rubbing against each other. I measured the space between each rod. That measurement dictated everything.

I made the bobbins using:
cardboard from my recycling bin
empty toilet paper rolls
hot glue gun and sticks
They’re easy to make, lightweight, inexpensive, and easy to replace.

Additional tools/ functions:

As I started using the shelf daily, I added a few small details that made a big difference to my workflow. I fixed a measuring tape on the side (just with sticky tape) so I could measure i-cord directly as I pulled it, and I attached scissors with a long elastic so they were always within reach. These additions saved time and helped me stay in the flow while working.
After a few years, as the shelf held more weight, I reinforced it. I added brackets and installed a top shelf, which gave the whole structure more balance, strength, and a bit of extra storage. This wasn’t part of the original plan, it was simply a response to how my setup evolved.
Final thoughts:
If I were to remake this i-cord holder today, there’s one thing I would do differently. Instead of screwing the rods permanently into the sides, I would design a system where the rods sit on hooks or removable supports. This would allow the rods to be lifted out and put back easily, making it much quicker to change bobbins, reorganise colours, or adapt the setup, all without tools. I also wish it could stand instead of being held against a wall.... so maybe one day I will improve it but not for now!
This i-cord holder wasn’t built in one day. It evolved with my practice, my workflow, and my needs as a maker.
If there’s one thing I’ve learned: you don’t need perfect tools: you need tools that work for you.
If you’re thinking of building your own, start simple. You can always improve it later!
For more tips, hacks, and behind-the-scenes crafty fun, come hang out with me on Instagram. I share lots of advice there and love connecting with fellow makers.
If you’d be interested in a proper step-by-step tutorial to build your own i-cord holder (with a full supplies list, measurements, and clear instructions) let me know in the comments.
If there’s enough demand, I might create it 😉
Happy crafting,
xx Lucie


Comments